An online appointment scheduler system is an essential tool for many types of businesses, whether be it service or product oriented. This system provides a convenient way for your customers to reach you on the time they prefer, based on your availability.
This can increase your efficiency since you can set your availability during the times you can accommodate a one-on-one meeting.. On the other hand, the customer can choose a convenient time for them that will not hinder their own schedule.
Appointments is a scheduling system within EngageBay, offered under the Sales module. The system has the following key features:
1. Slot - A section in the appointments where you can configure appointment slots.
2. Appointment Slot - The duration of time you can pre-set and have your users choose from the available slots. You can create a 1-hour slot, 30-minute slot and so on, depending on the kind of slots you need.
3. Preferences - A section in the appointments where you can set up business-hours, form settings, appointment description and schedule reminder emails.
4. CNAME - This is where you can configure the URL of your web-based appointment page if you want to customize it for white-labeling purposes.
5. Web-based appointment scheduling page - An EngageBay hosted page that a user/customer can access online to set up an appointment with you.
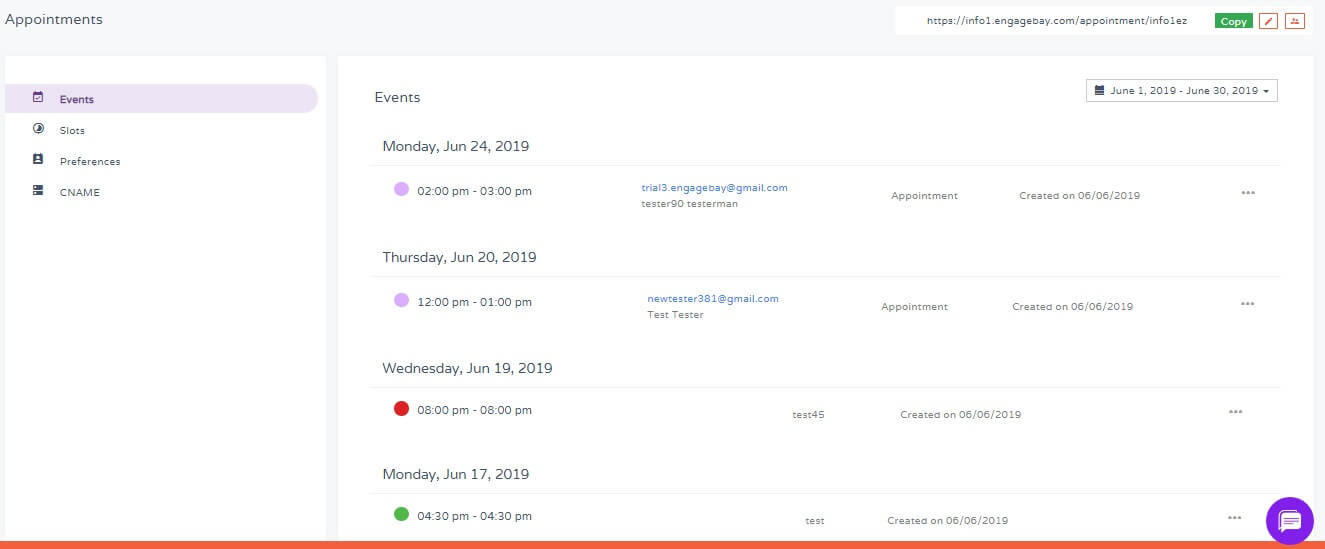
6. Events - A section on the appointments feature where you can see all your appointments with your clients.
Engagebay's appointment system allows your clients to schedule an appointment with you from the available slots. The available slots a user can choose from are based on your working hours which you define yourself. Duration of each slot is also something you defined and offer to your clients.
Just follow the steps below to set up an appointment slot:
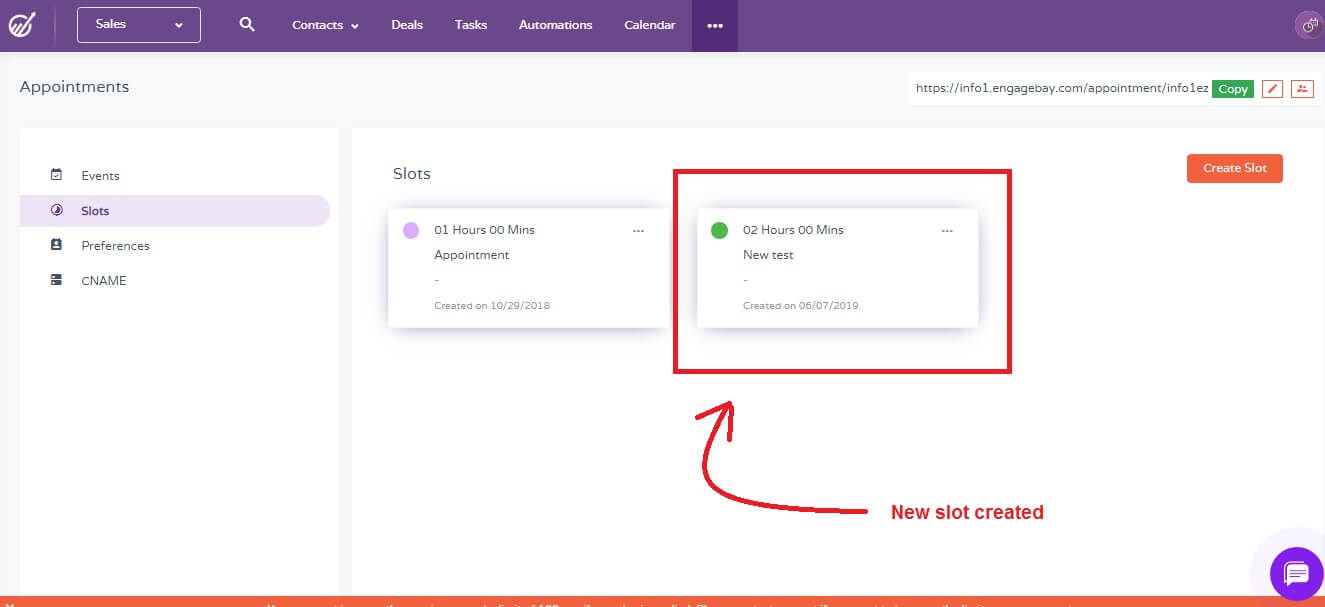
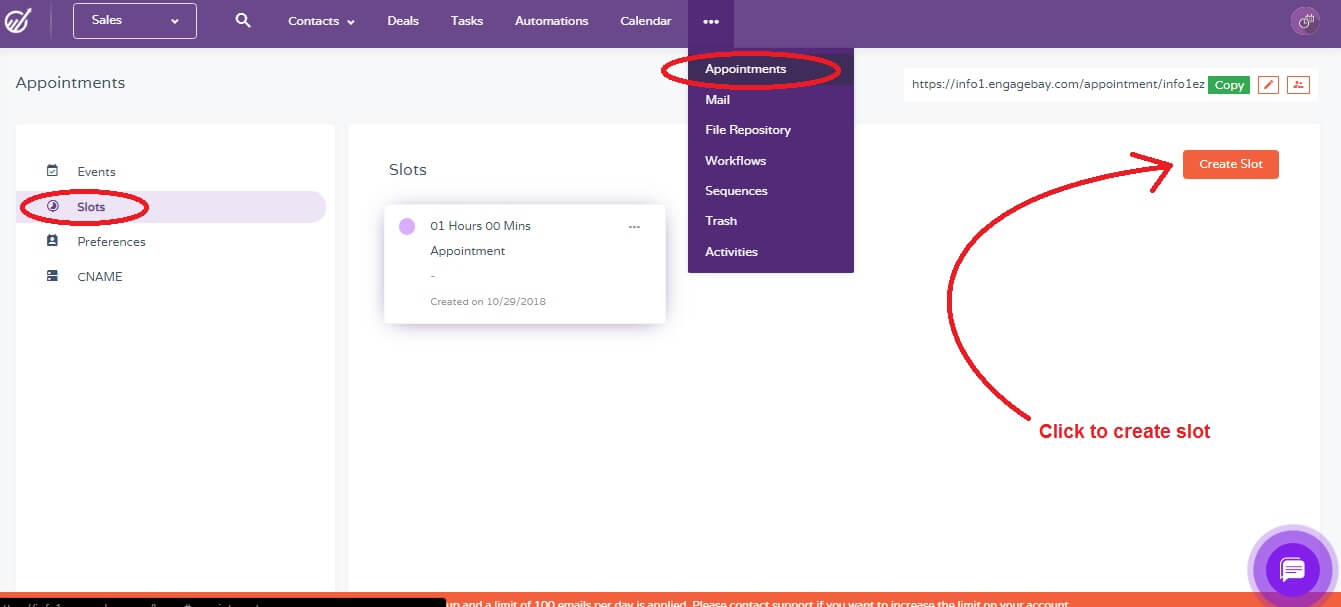
1. On your sales platform, click on "Appointments", click "Slots" option on the left side.
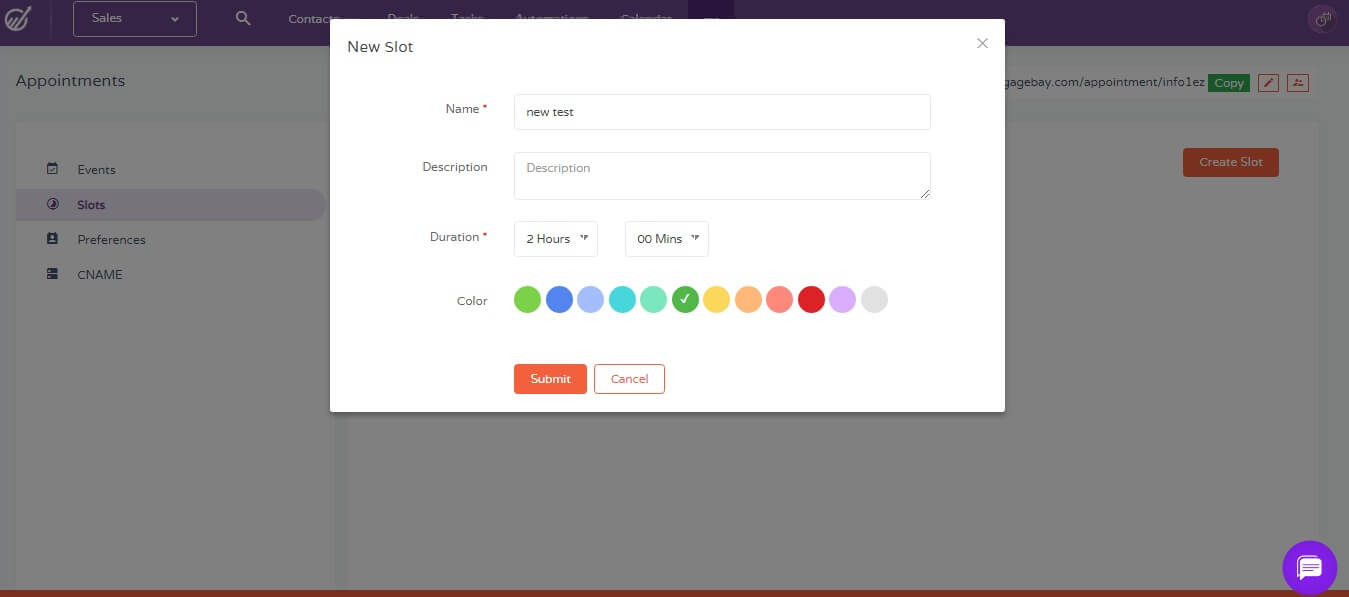
2. It will then show you the default slots available. If the defaults work for you, then there is no need to go further. If you want to add another type of slot, then you can click on "Create slot" button on the upper right. A setup pane will pop-up. Just name the slot, then choose the session duration and the color assigned for the slot. Then hit submit below.
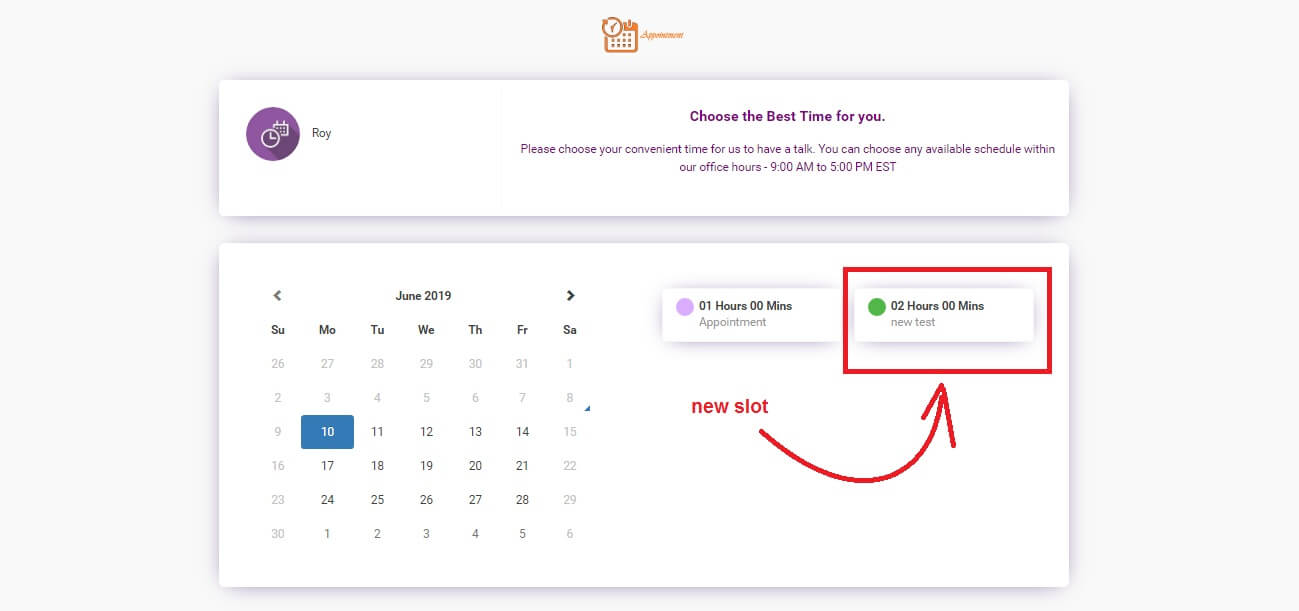
3. You will now see the slot you made on the dashboard. The same will show up on your “appointment scheduling page” as well.
Appointments Preferences in Engagebay allows you to define a couple of key elements in the appointments system. It allows you to define your working days and hours, the fields displayed on the form for appointment setting, the description on the appointments page and the content of your reminder email.
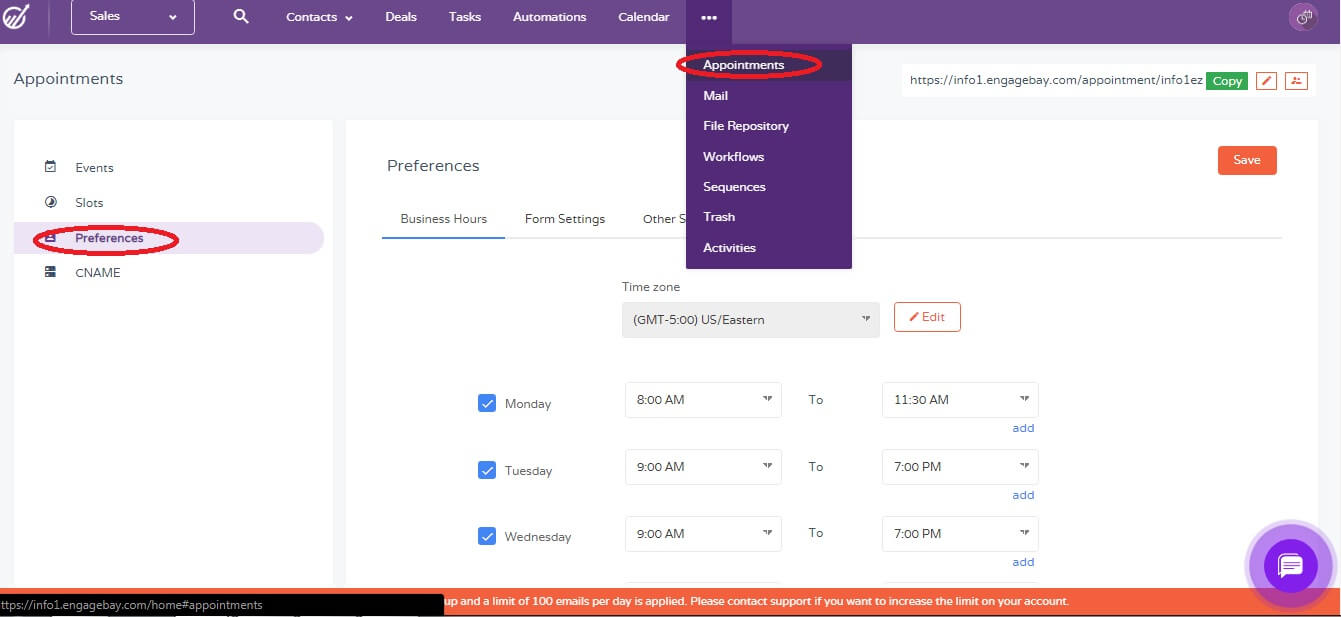
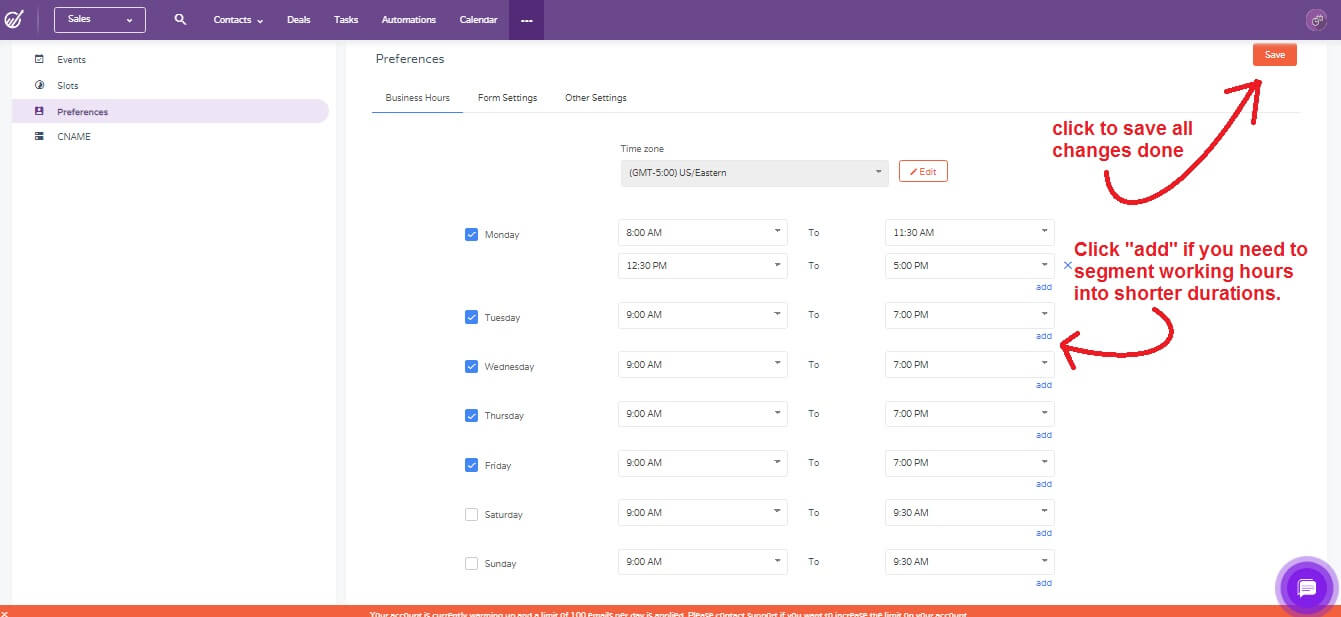
1. On your sales platform, click on "Appointments", click the "Preferences" option on the left side.
2. On the "Preferences" page you will be able to configure "Business Hours". You can also configure your working hours are and what days you want to be available for appointments. If there is a need to divide the working hours in a day, then simply click add and choose the slots you want to make available. Once all changes are done, please be sure to press save.
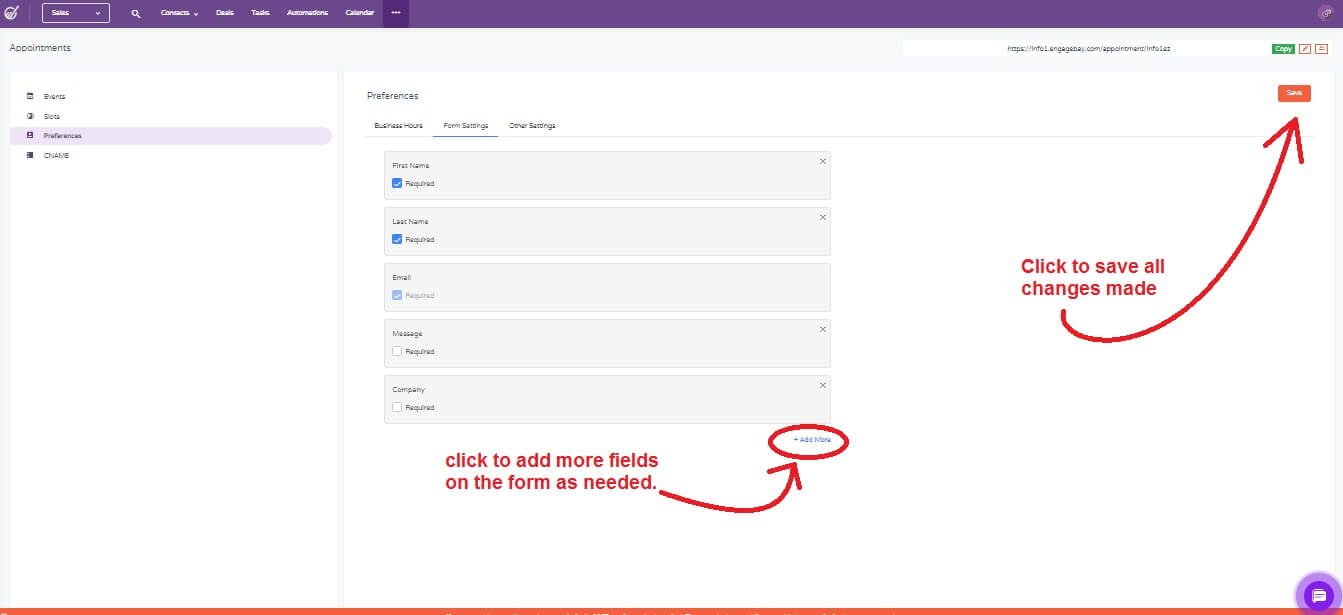
3. The next thing you need to configure is the "Form Settings". On the online page where you can set up an appointment, a form asks for user information when they try to book a slot. You cannot remove existing fields or add new fields based on your requirement. Email is set as “required” by default and you cannot edit that. Once changes are done, be sure to press save.
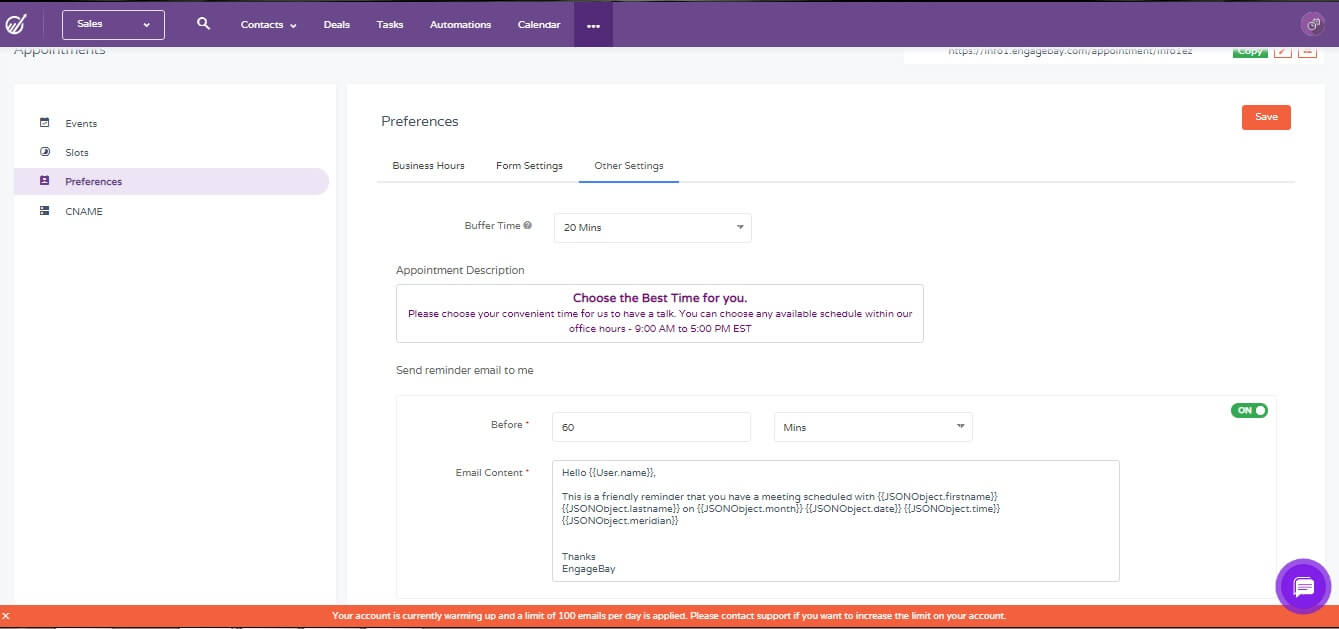
4. Finally, you can also configure other relevant details under "Other Settings". You can configure description, set up "Buffer time” which is the buffer time between schedules. You can enable reminder email and edit the content of reminder email. Once you are done with all the settings you need, please press the "save" button.
CNAME configuration is a relevant part of set-up if you want to implement white-labeling. This will allow you to customize the URL of your “appointment-scheduler page” and associate it with the URL of your own website.
Please do the steps below to set-up a CNAME:
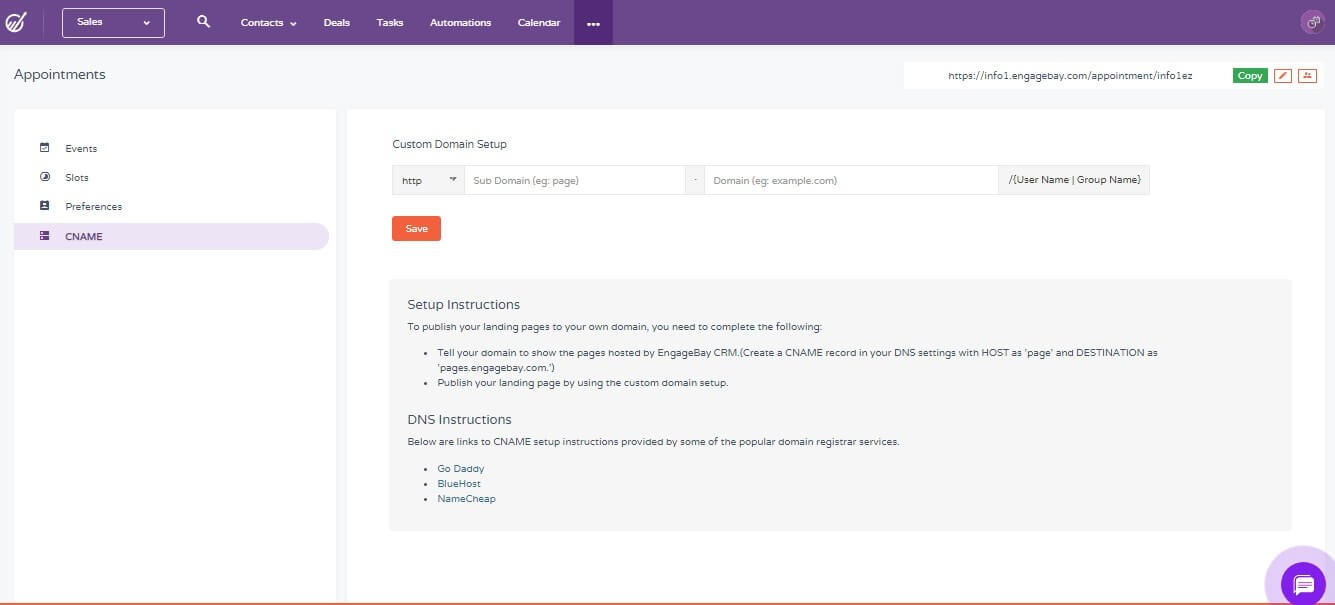
1. You need to create CNAME from your hosting panel first. The steps to doing this depend on who your website host is. Please contact your host and ask for assistance. Tell them you need to Create a CNAME record in your DNS settings with HOST as the “subdomain” of your choice and DESTINATION as 'pages.engagebay.com.'
“pages.engagebay.com” is constant. The format of the URL of your appointments page will be “subdomain.yourdomain.com/(username or group name). The only part you can customize is the “subdomain”.
2. Once you are done setting up the CNAME on the back end of your website. Simply proceed to the CNAME option under appointment and enter your configured CNAME on it. If you have SSL, choose HTTPS, if not keep it to HTTP.
Engagebay Appointments system will allow you or your client to set up an appointment online based on the available slots and with respect to the predefined working hours. To do that, they need to access your appointments page. In short, they need to know the URL of your “appointments page”. You will be able to get the URL of your appointments page on the upper right side of appointments. Simply click “copy” to copy the URL and you can start sharing the URL of your appointments page to your customers/users.
Users can set up an appointment using appointments page by:
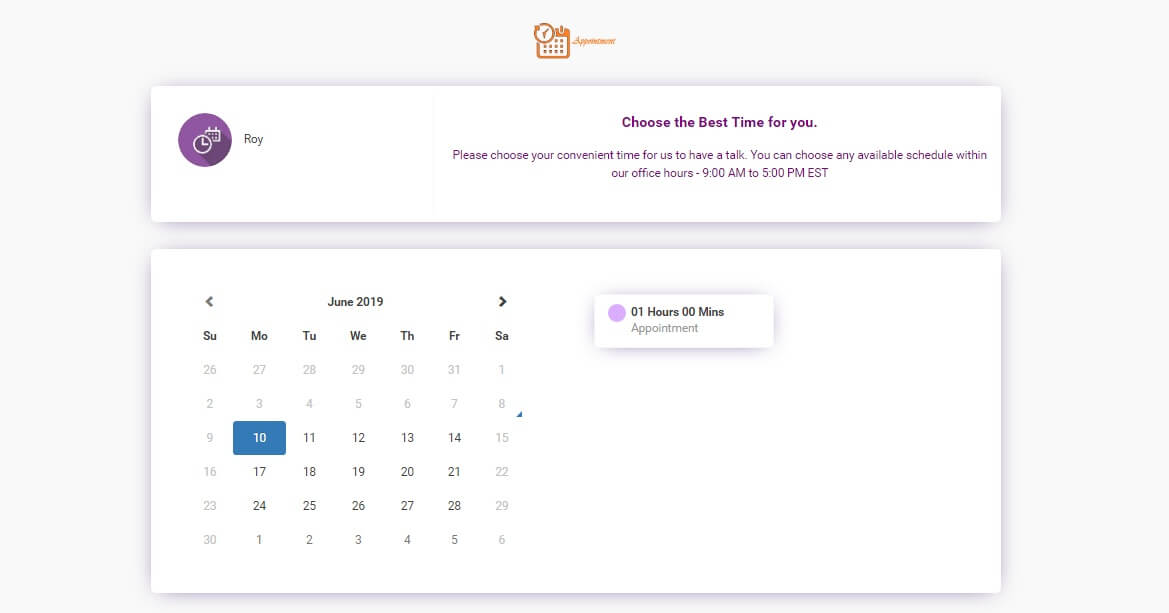
1. Accessing your “appointment-scheduler page” using the URL you shared.
2. User needs to choose an available date first (non-working days and dates no longer available are grayed out), then choose an appointment slot.
3. A pop-up will show up and the user can select the available time and fill out the form on it. Once done entering all needed info, the user can then press “schedule appointment” and it will be scheduled.
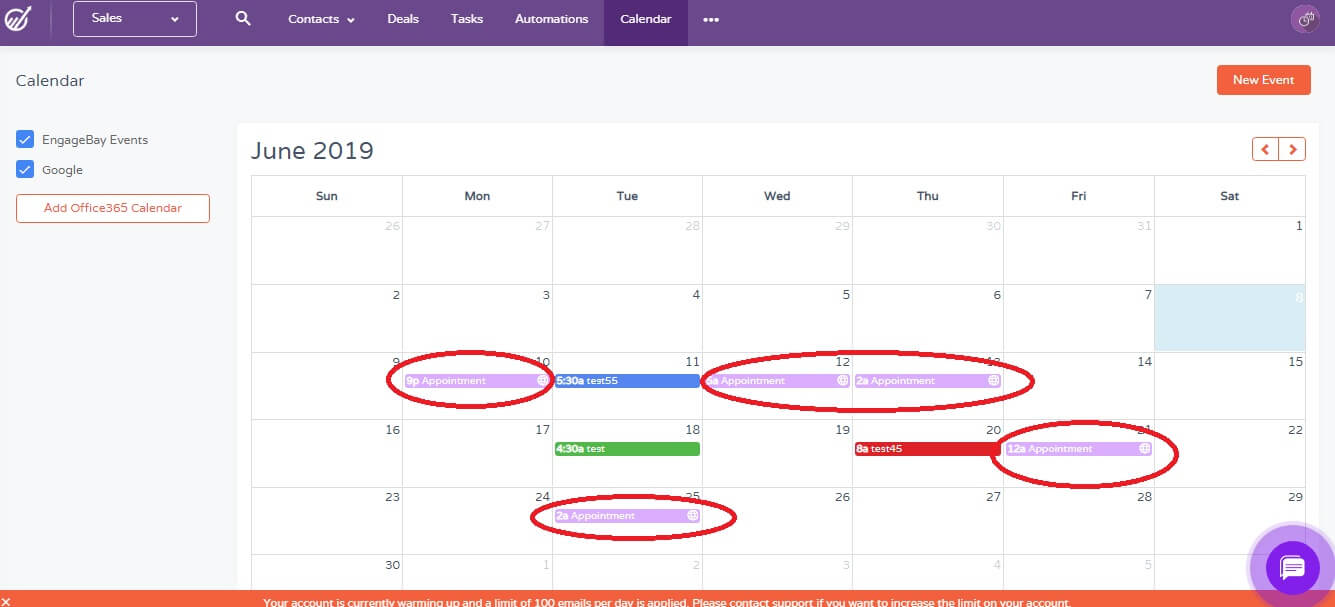
4. The appointment made will then appear on Events under appointments and your EngageBay Calendar.
I wanted to recommend EngageBay to all those small businesses out there that are looking to grow their businesses through a marketing and sales automation platform. We've been able to see a great adaption of our agency clients to the EngageBay platform and being able to leverage their digital marketing efforts.